
MELODY
an Ingerlise tutorial
published here with permission
You will need your own tube (main image) for this tutorial
The other materials are here for download


Open the mask in PSP and minimize it with the rest of the material.
Choose 2 colors from your material;
set your foreground color to the light color; for me #fdb757
and your background color to the dark color; for me #b25a10


Open a new transparent image 1000 x 650 pixels.
Selections/Select All.
Open your background image, for my example fbfd7cae378
Edit/Copy.
Go back to your work and go to Edit/Paste into Selection.
Selections/Select None.

Effects/Image Effects/Seamless Tiling, default settings.

Adjust/Blur/Gaussian Blur - radius 30.

Effects/Plugins/Mehdi - Sorting Tiles.

Effects/Reflection Effects/Rotating Mirror, default settings


Repeat but change the rotation angle to 90
Effects/Reflection Effects/Rotating Mirror.

Edit/Copy
Go back to your work and go to Edit/Paste as new layer.
With your Pick Tool 
set Position X to 0,00
set Position X to 0,00


Effects/Texture Effects/Weave
weave color: background color
gap color: foreground color.
weave color: background color
gap color: foreground color.


and click in the top left frame to select it.

Layers/New Raster Layer.
Layers/Arrange/Move Down.
Open another background image, for my example 8578e9a72216
Edit/Copy.
Go back to your work and go to Edit/Paste into Selection.
Activate the top layer of the template.
Selections/Modify/Select Selection Borders
Selections/Modify/Select Selection Borders

Layers/New Raster Layer.
Flood Fill the selection with your Gradient.
Selections/Select None.
Selections/Select None.
Activate your Magic Wand Tool
and click inside the frame you just created
and click inside the frame you just created
Effects/3D Effects/Cutout.

Selections/Select None.
Layers/Merge/Merge Down.
Stay on the template layer, Raster 2.
Activate your Magic Wand Tool
and click in the central left frame to select it.

Open another background image, for my example 2fcb657fa72f
Edit/Copy.
Go back to your work and go to Edit>Paste into Selection.
Activate the layer of the template, Raster 2.
Selections/Modify>Select Selection Borders, same settings.

Edit/Copy.
Go back to your work and go to Edit/Paste into Selection.
Activate the layer of the template, Raster 2.
Selections/Modify/Select Selection Borders , same settings.
Layers/New Raster Layer.
Flood Fill the selection with your Gradient.
Selections/Select None.
Click inside the frame to select it with your Magic Wand Tool
Effects/3D Effects/Cutout, same settings.
Selections/Select None.
Layers/Merge/Merge Down, and you again go to the template layer.

Repeat these steps for the other 3 frames with other 3 background image.
Layers/Merge/Merge Down.
K key to activate your Pick Tool
and set Position X: -57,00 and Position Y: 0,00.
and set Position X: -57,00 and Position Y: 0,00.

Open Deko-1
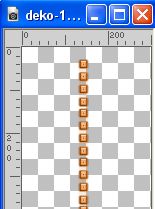
Edit/Copy.
Go back to your work and go to Edit/Paste as new layer.
Set Position X: 539,00 and Position Y: -2,00


Effects/3D Effects/Drop Shadow.

Layers/New Raster Layer.
Set your background color to white.
Flood Fill the layer with white.
Layers/New Mask layer/From image
Open the menu under the source window and you'll see all the files open.
Select the mask NarahsMasks_1760
Open the menu under the source window and you'll see all the files open.
Select the mask NarahsMasks_1760

Effects/Edge Effects/Enhance.
Layers/Merge/Merge Group.
Activate your Magic Wand Tool
click in the top little frame to select the mask
click in the top little frame to select the mask

Set your background color back to original color, to get the same foreground Gradient.
Flood Fill the selection with your Gradient.
Effects/Texture Effects/Blinds, with the lighter color.
Effects/Texture Effects/Blinds, with the lighter color.

Effects/Edge Effects/Enhance.
Selections/Select None.
Selections/Select None.
K key to activate your Pick Tool
and set Position X: 102,00 and Position Y: -68,00.
and set Position X: 102,00 and Position Y: -68,00.


Layers/Duplicate.
Image/Flip.
Open your background misted, for my example 74c07c10a7908...
Edit/Copy.
Go back to your work and go to Edit/Paste as new layer.
Image/Resize, if necessary.
Adjust/Sharpness/Sharpen.
Go back to your work and go to Edit/Paste as new layer.
Image/Resize, if necessary.
Adjust/Sharpness/Sharpen.
Move the tube to the right side.
Move this layer to the second place from the bottom.

Image/Canvas size - 1100 x 750 pixels

Layers/New Raster Layer.
Layers/Arrange/Move Down.
Layers/Arrange/Move Down.
Flood Fill the layer with your dark color.
Selections/Select All.
Selections/Select All.
Layers/New Raster Layer.
Set your foreground color to Color.
Flood Fill the layer with your light color.
Selections/Modify/Contracter - 2 pixels.
Press DELETE on the keyboard
Selections/Modify/Contract/ - 10 pixels.
Flood Fill with your light color.
Selections/Modify/Contract - 2 pixels.
Press DELETE on the keyboard.
Selections/Modify/Contracter - 10 pixels.
Flood Fill with your light color
Selections.Modify.Contract. - 2 pixels.
Press DELETE on the keyboard.
Selections/Modify/Contract/ - 10 pixels.
Flood Fill with your light color.
Selections/Modify/Contracter - 2 pixels.
Press DELETE on the keyboard.
Selections/Modify/Contracter - 10 pixels.
Flood Fill with your light color
Flood Fill with your light color
Selections/Modify/Contract - 5 pixels.
Press DELETE on the keyboard.
Selections/Select None.
Layers/Arrange/Move Up.
Effects/3D Effects/Drop Shadow, same settings.
Open deko 2
Edit/Copy.
Go back to your work and go to Edit/Paste as new layer.
Colorise with your colors.
Effects/3D Effects/Drop Shadow, same settings.
Go back to your work and go to Edit/Paste as new layer.
Colorise with your colors.
Effects/3D Effects/Drop Shadow, same settings.
Open your main tube
Edit/Copy.
Go back to your work and go to Edit/Paste as new layer.
Image/Resize, if necessary.
Adjust/Sharpness/Sharpen.
Go back to your work and go to Edit/Paste as new layer.
Image/Resize, if necessary.
Adjust/Sharpness/Sharpen.
Effects/3D Effects/Drop Shadow.

Layers/Merge/Merge All.
Image/Resize, 1030 pixels width, resize all layers checked.
If necessary, Adjust/Sharpness/Sharpen.
Sign your work on a new layer.
Layers/Merge/Merge All and save as jpg.
Image/Resize, 1030 pixels width, resize all layers checked.
If necessary, Adjust/Sharpness/Sharpen.
Sign your work on a new layer.
Layers/Merge/Merge All and save as jpg.